

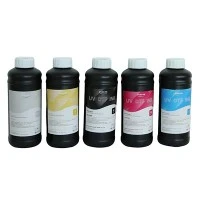


Full Set Replacement Precautions for Mimaki LUS Series UV-Curable Ink
I. Pre-replacement: Ink, Environment, and Safety Preparation
1. Strict Requirements for Ink Model and Expiration Date
1).Mixing ink series is strictly prohibited: Only the exclusive mimaki LUS uv ink corresponding to the specific machine model (LUS-120/150/170/210) can be used. Cross-mixing with other UV inks such as LH, LF, and SS is forbidden. Different series of UV inks will react chemically, causing printhead clogging, tubing corrosion, and ink pump damage.
2). Verify Color Code Matching: C/M/Y/K/W/CL/PR channels must each correspond to the same series and color of LUS ink. White ink, varnish, and primer are not interchangeable.
3). Check Expiration Date: Ink bags/bottles are labeled with an expiration date. Expired ink will cause precipitation, solidification, color difference, and ink starvation; if expired by more than 2 months, the machine will be forcibly locked and unable to print. Use up opened ink as soon as possible.
4). Temperature Acclimatization: Ink storage temperature is 15–25°C. If ink is taken out from a cold storage/low-temperature environment, let it sit at room temperature for more than 3 hours before use. Large temperature differences will cause bubbles, abnormal viscosity, and printhead streaking.
5). Light-proof Storage: Unopened ink must be kept away from light throughout the process. UV/direct sunlight will cause the ink to solidify and clump prematurely, resulting in the entire package being scrapped.
2. Environmental Temperature and Humidity Standards
Workshop temperature: 18–25°C; humidity: 35%–65%. Avoid direct sunlight on the machine and ink tank. A humid environment can easily cause chip short circuits, and high temperatures will accelerate ink self-solidification and clogging.
3. New ink pretreatment (critical to prevent sedimentation and ink interruption)
LUS contains pigment particles, which will settle and separate if left standing:
1). Shake the entire ink bag horizontally back and forth at least 20 times (about 1–2 minutes) to thoroughly mix the pigment; let it stand for 2 minutes after mixing to eliminate bubbles before installing it into the machine.
2). Do not tear open the seal of the ink bag before unpacking; open it only before installation to prevent air from entering prematurely and creating bubbles.
II. Operating specifications for disassembly and ink bag replacement
1. Machine Status Requirements
1). Keep the printer powered on. Enter the [Replace Ink] mode from the screen menu; the machine will automatically move the printhead to the safe replacement position. Turning off the power to replace ink will cause a large amount of air to enter the ink lines, making it extremely easy to clog the printhead later.
2). Do not force the cover open to remove ink during printing, cleaning, or ink filling processes.
2. Removing the Old Ink Bag
1) Press the ink tank latch, open the cover, and slowly pull out the old ink bag. Slow down the movement to prevent residual ink from dripping and contaminating the machine's circuit board.
2). Remove the old ink bag with the interface facing up to avoid residual ink flowing back into the lines and causing color mixing; if ink leaks, immediately wipe the machine body and sensors with the dedicated UV cleaning solution.
3. Steps for Installing a New LUS Ink Bag
1). Place the new ink bag with the double-sided tape facing down. Align the connector with the slot and snap it firmly into place; an offset connector will cause ink interruption or insufficient ink supply.
2). Smooth out the wrinkles of the ink bag, peel off the double-sided tape on the back, and fix it inside the ink tank to prevent the ink bag from shifting and sucking in air bubbles during the printing process.
3). The installation of the IC chip is of utmost importance:
Each LUS ink bag is equipped with an independent original IC chip. Do not mix old chips or third-party cracked chips. The metal surface of the chip electrodes must face up and fit tightly into the slot without any gaps. Do not install it backward; do not touch the metal contacts of the chip with your fingers, as fingerprints will cause recognition failure and ink errors. Snap the latch to lock the cover and ensure there is no looseness.
4. Machine Installation Taboos
1). Do not force the ink cartridge in. If it gets stuck, it means the model or chip orientation is incorrect; forcing it down will damage the internal ink supply valve.
2). When replacing multiple colors simultaneously, replace them channel by channel. Do not empty all ink tanks at once to significantly reduce air entering the lines.
III. Complete cross-series ink replacement (replacing old LH/LF with LUS, full system cleaning)
If the machine originally used other inks, directly replacing them with LUS will cause severe printhead clogging. A complete cleaning process is mandatory:
1. Drain all old ink, remove all old ink bags, load the machine-specific UV cleaning solution.
Perform a strong cleaning pipeline circulation cleaning 3–5 times, with 10-minute intervals, until the liquid ejected the printhead is completely colorless.
2. Replace the machine's built-in filters (ink path filter, pre-printhead filter); residual old ink will react withUS to form gel and clog the pipelines.
3. After the cleaning is complete, load the LUS ink, perform multiple ink filling and air purging cycles, and print multiple test to confirm there are no color impurities.
IV. Post-installation Initialization, Air Bleeding, and Inspection
1. Close the ink tank cover; the machine will automatically recognize the IC chip. Wait for the screen to complete the ink initialization; if "Ink not recognized" is prompted, remove the chip, wipe the metal contacts, and reinstall it.
2. After initialization is complete, perform 1 standard printhead cleaning; do not perform multiple continuous power cleanings (wastes ink and damages the piezoelectric printhead).
3. Printhead test strip: Check each channel for broken lines, ink misting, and streaking; white ink LUS is prone to sedimentation, so if lines are broken, an additional white ink-specific circulation cleaning can be performed.
4. If slight air bubbles or ink breaks occur: Let the machine sit for 15–30 minutes to allow air bubbles in the tubes to float up, then perform a light cleaning.
V. Daily Use and Storage Taboos
1. Prohibit strong light exposure to the ink tank: UV lamps in the workshop and direct sunlight on the ink bag will cause the ink to solidify and clump inside the bag, directly scrapping the entire bag.
2. The ink tank temperature must not exceed 30°C; high temperatures will accelerate ink self-solidification. For long-term downtime, the ink bag must be removed and stored in a dark, cool place (15–22°C).
3. Do not run the ink bag empty for a long time; ink shortage in the lines will burn out the ink supply pump and the piezoelectric crystals of the printhead.
4. It is recommended to use the ink bag within 3 months after opening; if left open for too long, the pigment dispersibility will decrease, leading to color differences and poor adhesion.
5. Cleaning must only use Mimaki's matching UV cleaning solution; solvent-based cleaning solutions will corrode the LUS ink lines.
VI. Key Points for Fault Prevention
1. Poor chip contact: Keep the chip contacts dry and free of ink; wipe up ink leaks promptly to avoid short circuit errors.
2. Insufficient ink supply: Check if the ink bag connector is properly seated and the double-sided tape is securely fixed; wrinkles in the ink bag will suck in air.
3. Printhead clogging: Shake the ink well after each replacement, control the ambient temperature, replace the filter regularly, and do not mix different series of UV inks.
4. Poor curing: Using expired LUS ink or unmixed ink layers will lead to poor adhesion, scratching, and stickiness.
